
Quality dental treatment performed by a team of experts
Explore Our Services


Zirconia Implants
Zirconia is a very biocompatible material, proven for almost 2 decades as crown and bridgematerial.

Bone Augmentation
In case sufficient hard tissue isnt available, there are different techniques to achieve better conditions.
Case Studies
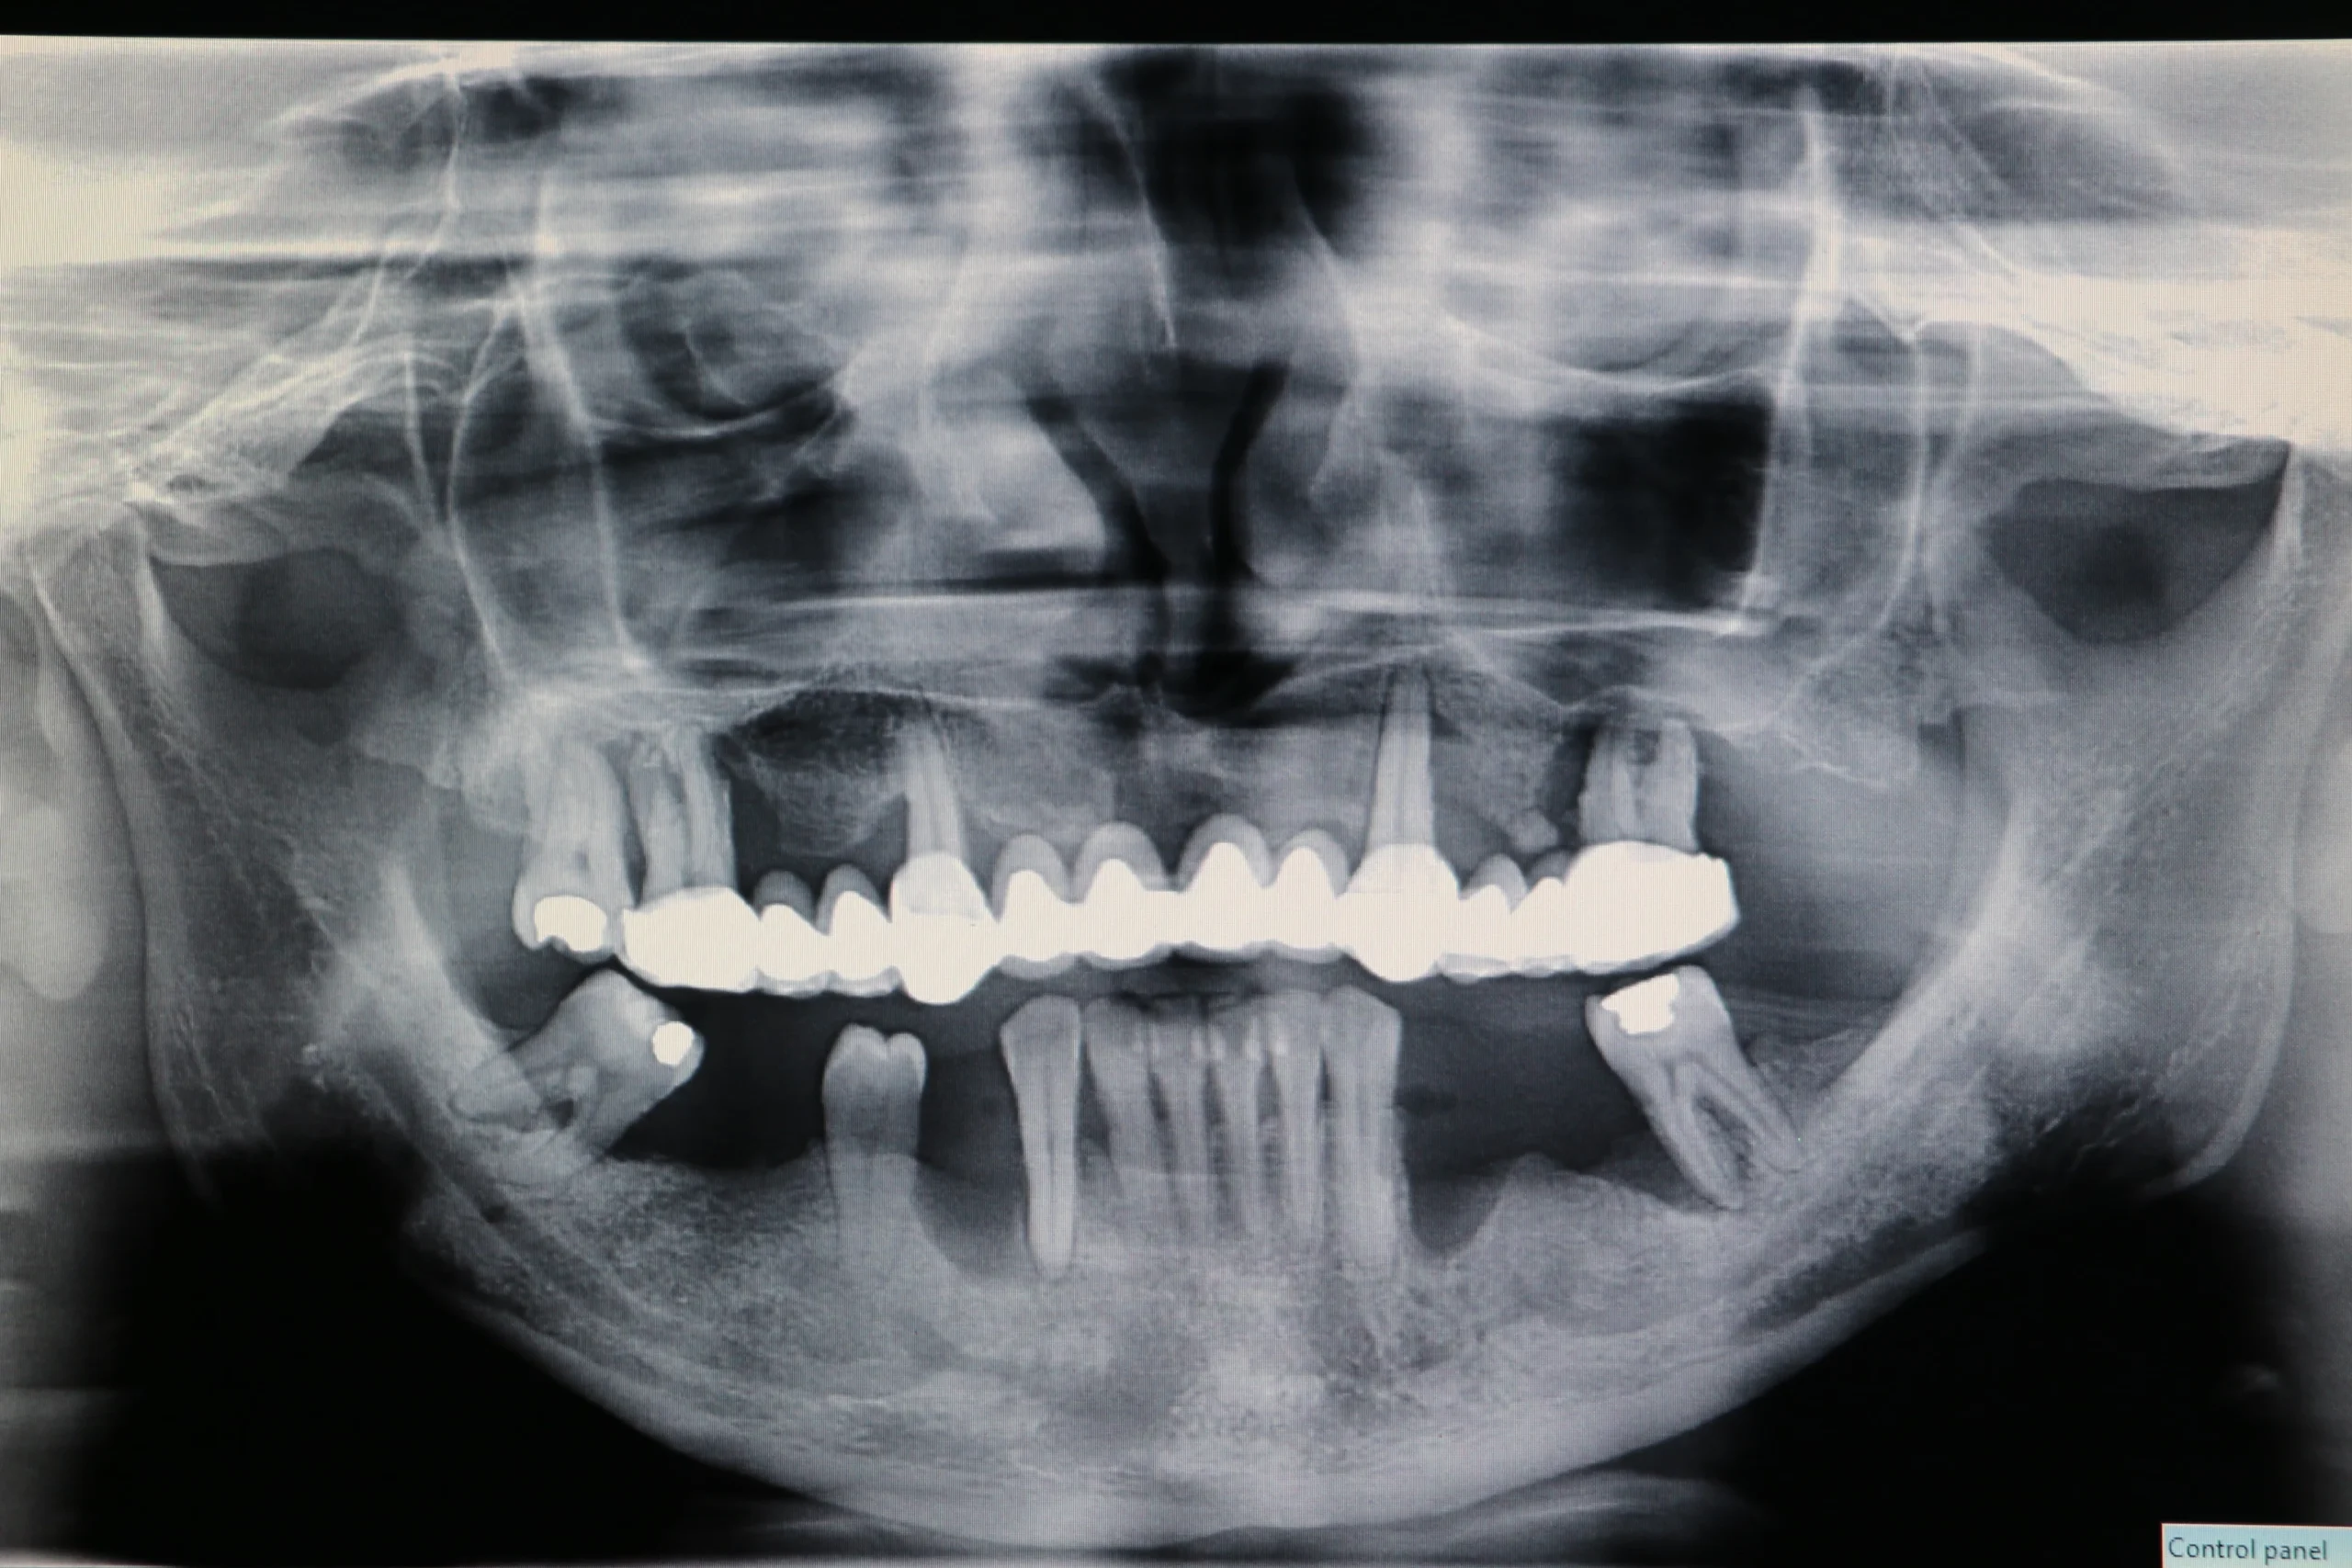
"All on 4" treatment
This patient had periodontal issues. After virtually planning the case, scaling and root planning, we extracted tooth number 12 and 22, placed 2 implants and added 2 implants on the bilateral rear position slanted towards distal. After 3 months we loaded with an "All on 4 " bridge with zirkonium base
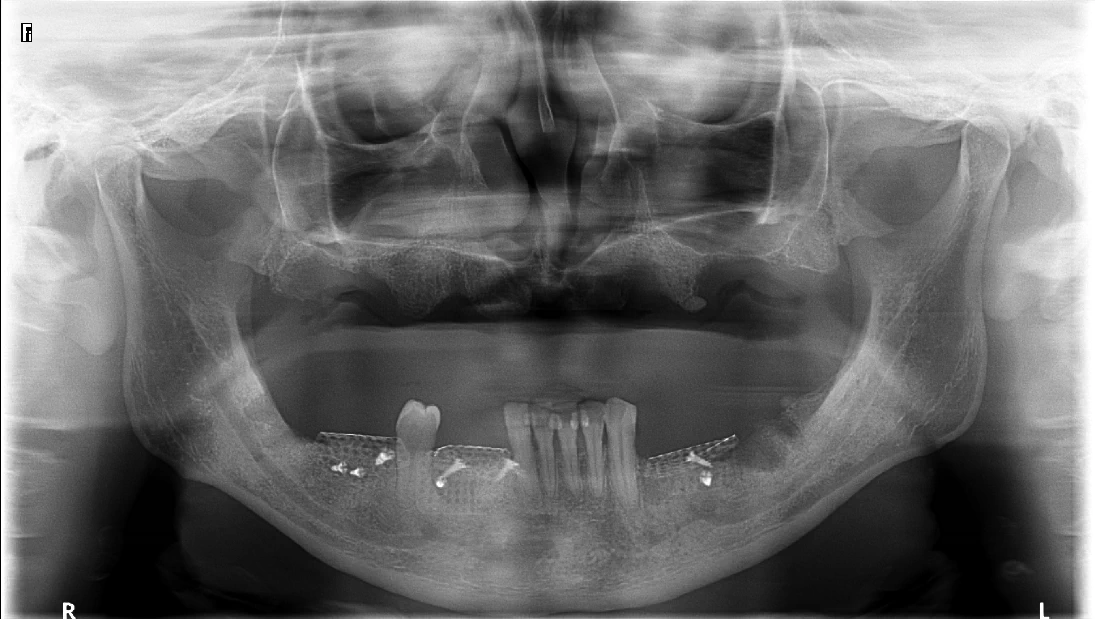
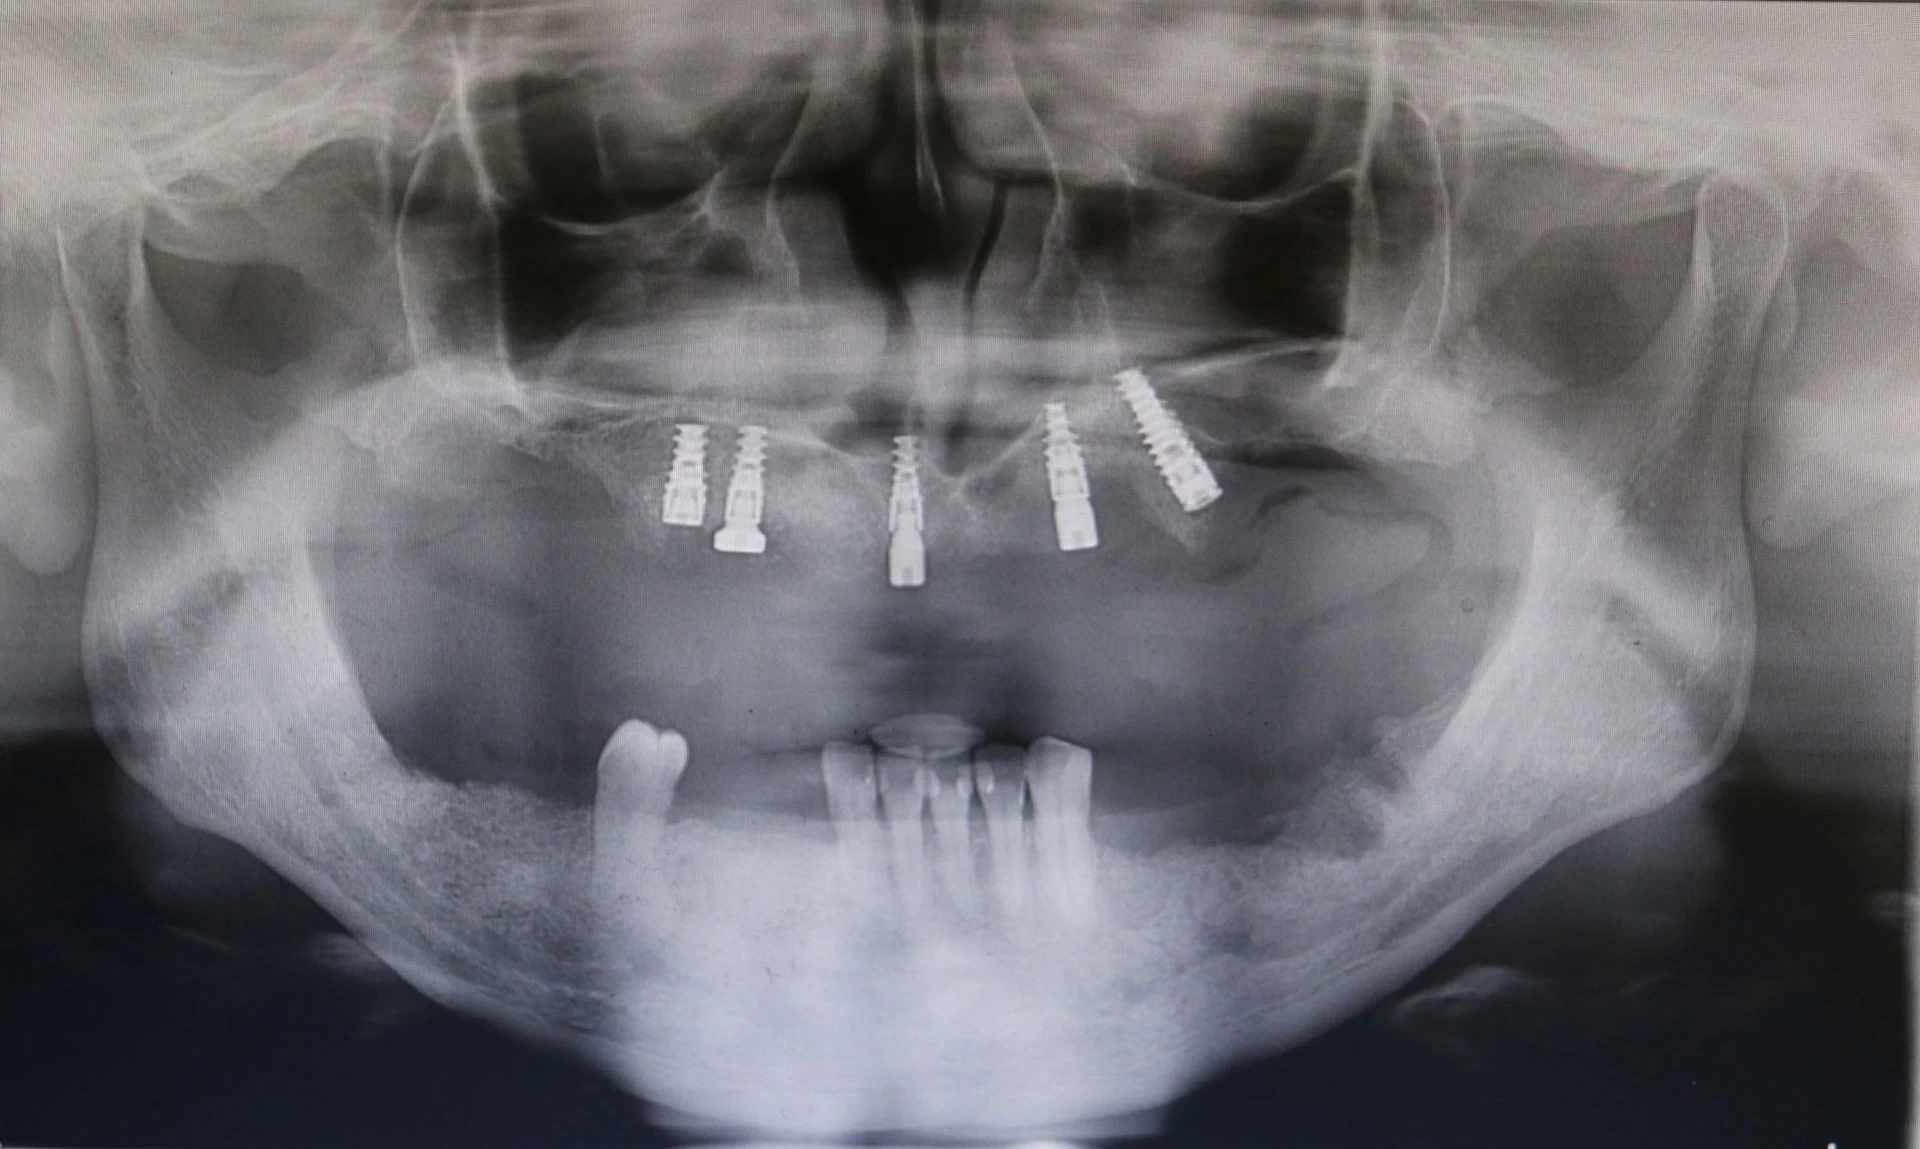
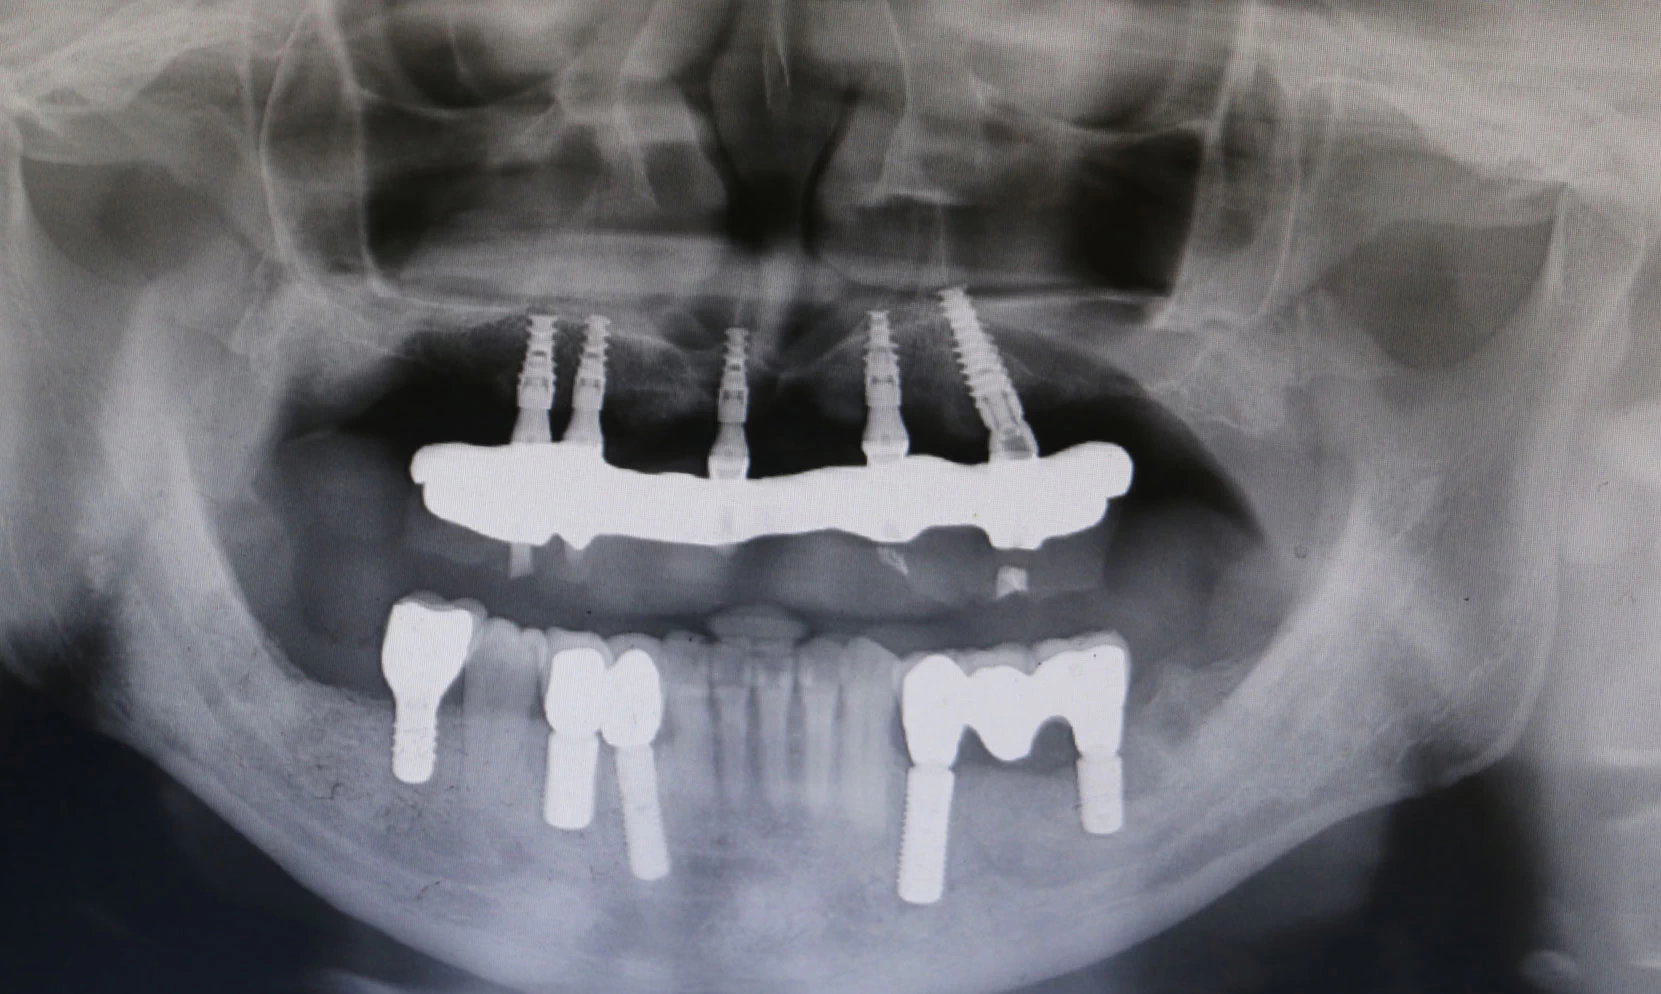
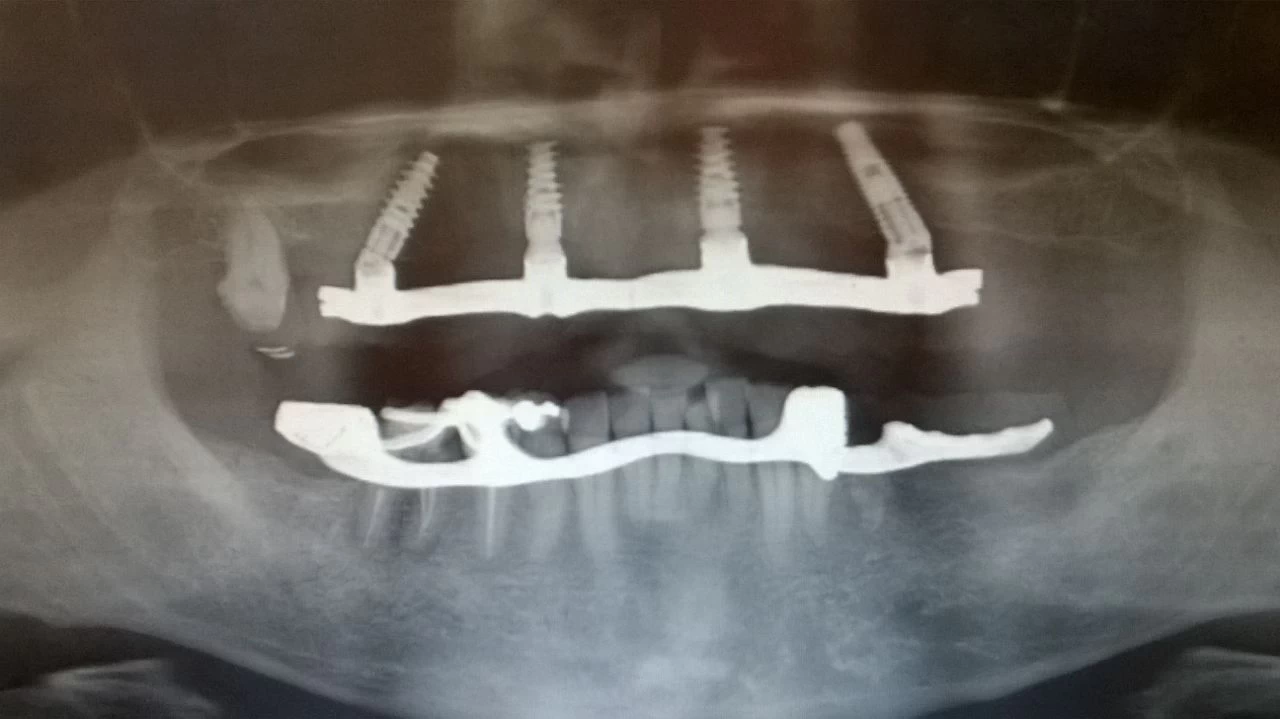
Full mouth implantation
This patient had severe periodontal issues with few remaining bone in the upper and lower arch due to periodontitis related bone loss. After performing all necessary extractions, we augmented the lower arch with titanium meshes and beta-tricalcium phosphate. Several months later we implanted 4 Nobel Active and 1 Nobel Speedy in the upper arch (distal slanted technique in quadrant 2) and 5 Straumann SLA active implants in the lower arch. After a short osseointegration period, we loaded the implants with screw a retained restoration in the upper arch and on meso abutments cemented bridgework in the lower arch.
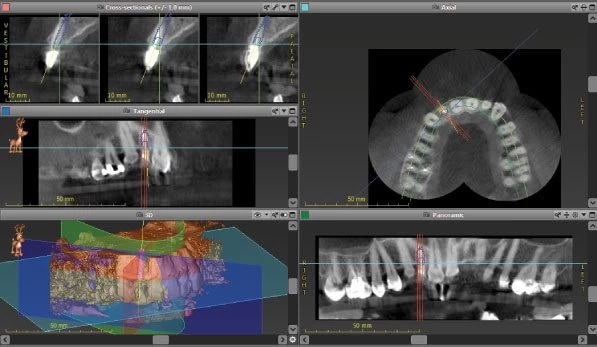
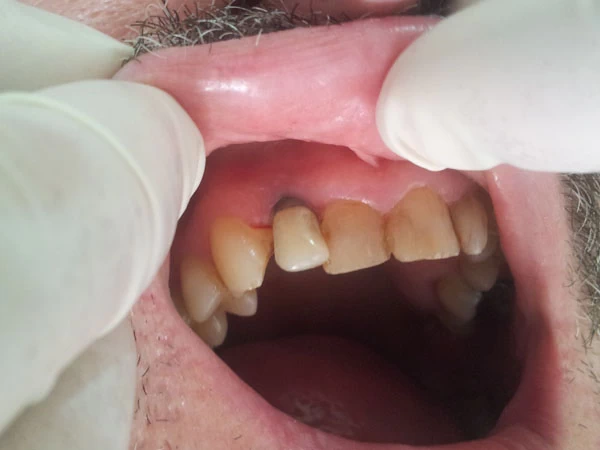
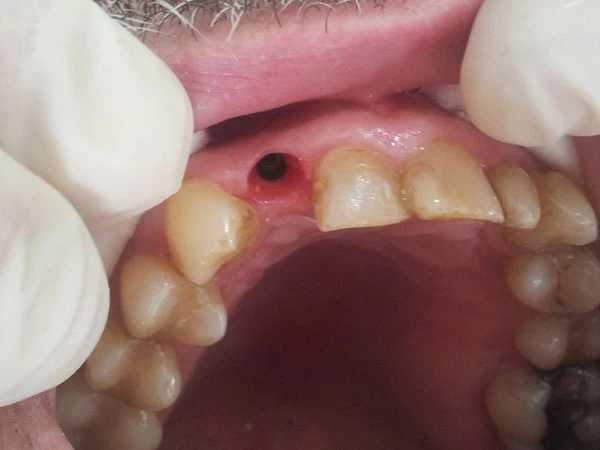
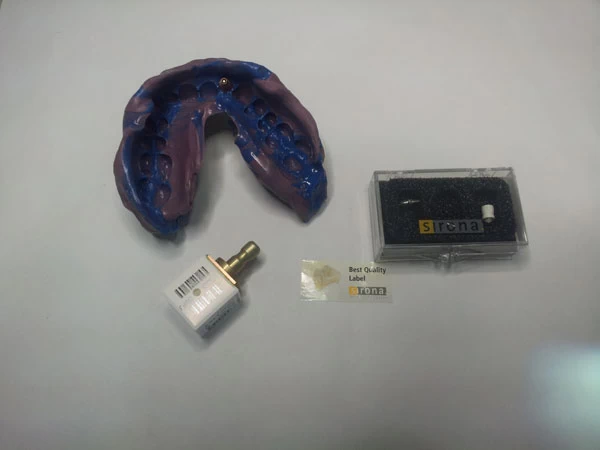
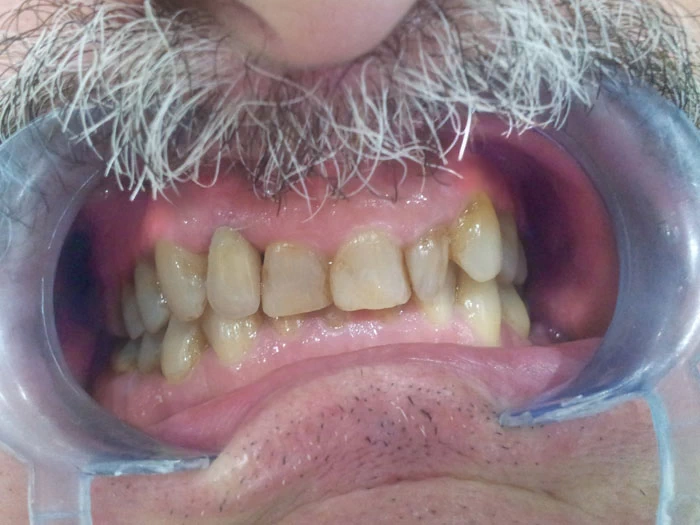
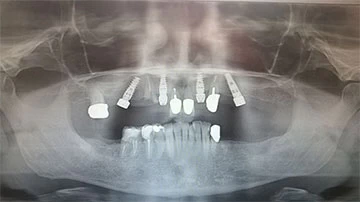
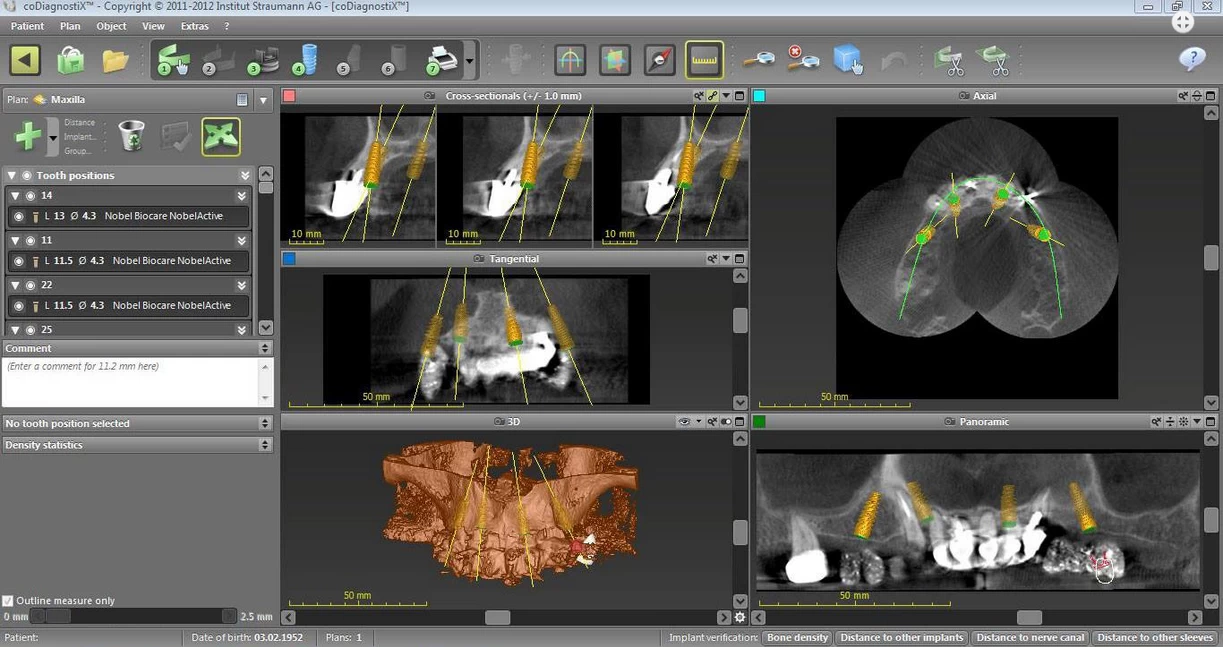
Single implantation with a Nobel Biocare/Active implant
This lateral incisor of this patient was severely damaged(root fracture), indicated for extraction. We planned the implantation with the Straumann Co Diagnostix software. Fortunately, the implant achieved a high initial stability of 35 NCM, which allowed us to insert a temporary abutment and temporary crown right after the implantation of a Nobel Biocare/Active implant. We formed the implant surrounding gums with a slight modification of the provisional abutment within 2 months. After achieving the expected result, we individualized the impression post to adapt exactly to gum architecture. We fabricated an individual zirconium abutment based on a titanium platform. After completing the abutment, we fabricated a zirconium restoration, matching the adjacent teeth perfectly.
Testimonials
What Patients Say About Us
Patient
"The best dental service anywhere thank you"
Patient
"Excellent Service all the way round."
Patient
"They made our visit worthwhile and worth it from the waiting time untill you pay."
Patient
"Very professional Doctors and staff and highly recommendable Dental Clinic. Outstanding and affordable services, and this is the place to go for all your dental problems."
Patient
"Helpful staff, clean facility & high tech machineries."
Patient
"I would highly recommend this dental clinic. They have a complete facility, friendly staff and the best dentist Dr Elkie. Her work is outstanding. She is very professional to all her clients even if you're from abroad or not. Thank you Dr Elkie. (My daughter misses your daughter)"